Keycloak Authentication Setup with Remix
Introduction
This documentation outlines the steps required to set up Keycloak authentication with Remix, utilizing a custom Keycloak strategy. The setup involves configuring the Keycloak dashboard, defining a resource route, and managing user sessions.
Keycloak Strategy Configuration
We set up a separate Keycloak strategy to be used for authentication:
new KeycloakStrategy() <
    T >
    ({
        useSSL: true,
        domain: config.KEYCLOAK_SERVER_DOMAIN,
        realm: config.KEYCLOAK_REALM,
        clientID: config.KEYCLOAK_CLIENT_ID,
        clientSecret: config.KEYCLOAK_CLIENT_SECRET,
        callbackURL: config.CALLBACK_REDIRECT_URL,
    },
    callback);
Get the values for KEYCLOAK_CLIENT_ID, KEYCLOAK_CLIENT_SECRET, and KEYCLOAK_REALM from the Keycloak dashboard.
Resource Route Setup
We set up a resource route in the user-auth-browser package at /resources/auth-keycloak. The purpose of this resource route is to handle the authentication request using the Keycloak strategy we configured. You can check authenticator.server.ts to see its implementation.
Login Button Integration
We have set up a login button on the login page of the ant package. When the login button is clicked, it calls the resource route /resources/auth-keycloak.
Post-Login Flow
Once the user is logged in and redirected back to our platform, the authenticator calls the Keycloak strategy to validate the code received and exchange it for tokens. These tokens are then saved in session storage (using either Redis or cookies, depending on the configuration).
Backend Token Validation
For the backend to validate the token properly, ensure the following environment variables are set up:
AUTH0_API_AUDIENCE = cdebase(or whatever the client audience is set in your client configuration from the Keycloak dashboard)AUTH0_ISSUER = https://keycloak.cdebase.dev/realms/masterAUTH_JWKS_URI = https://keycloak.cdebase.dev/realms/master/protocol/openid-connect/certs
Keycloak Admin Client
We are using the @keycloak/keycloak-admin-client to fetch information about user profiles and perform other data manipulations.
Keycloak Dashboard Configuration
Following are the important points related to Keycloak dashboard configuration:
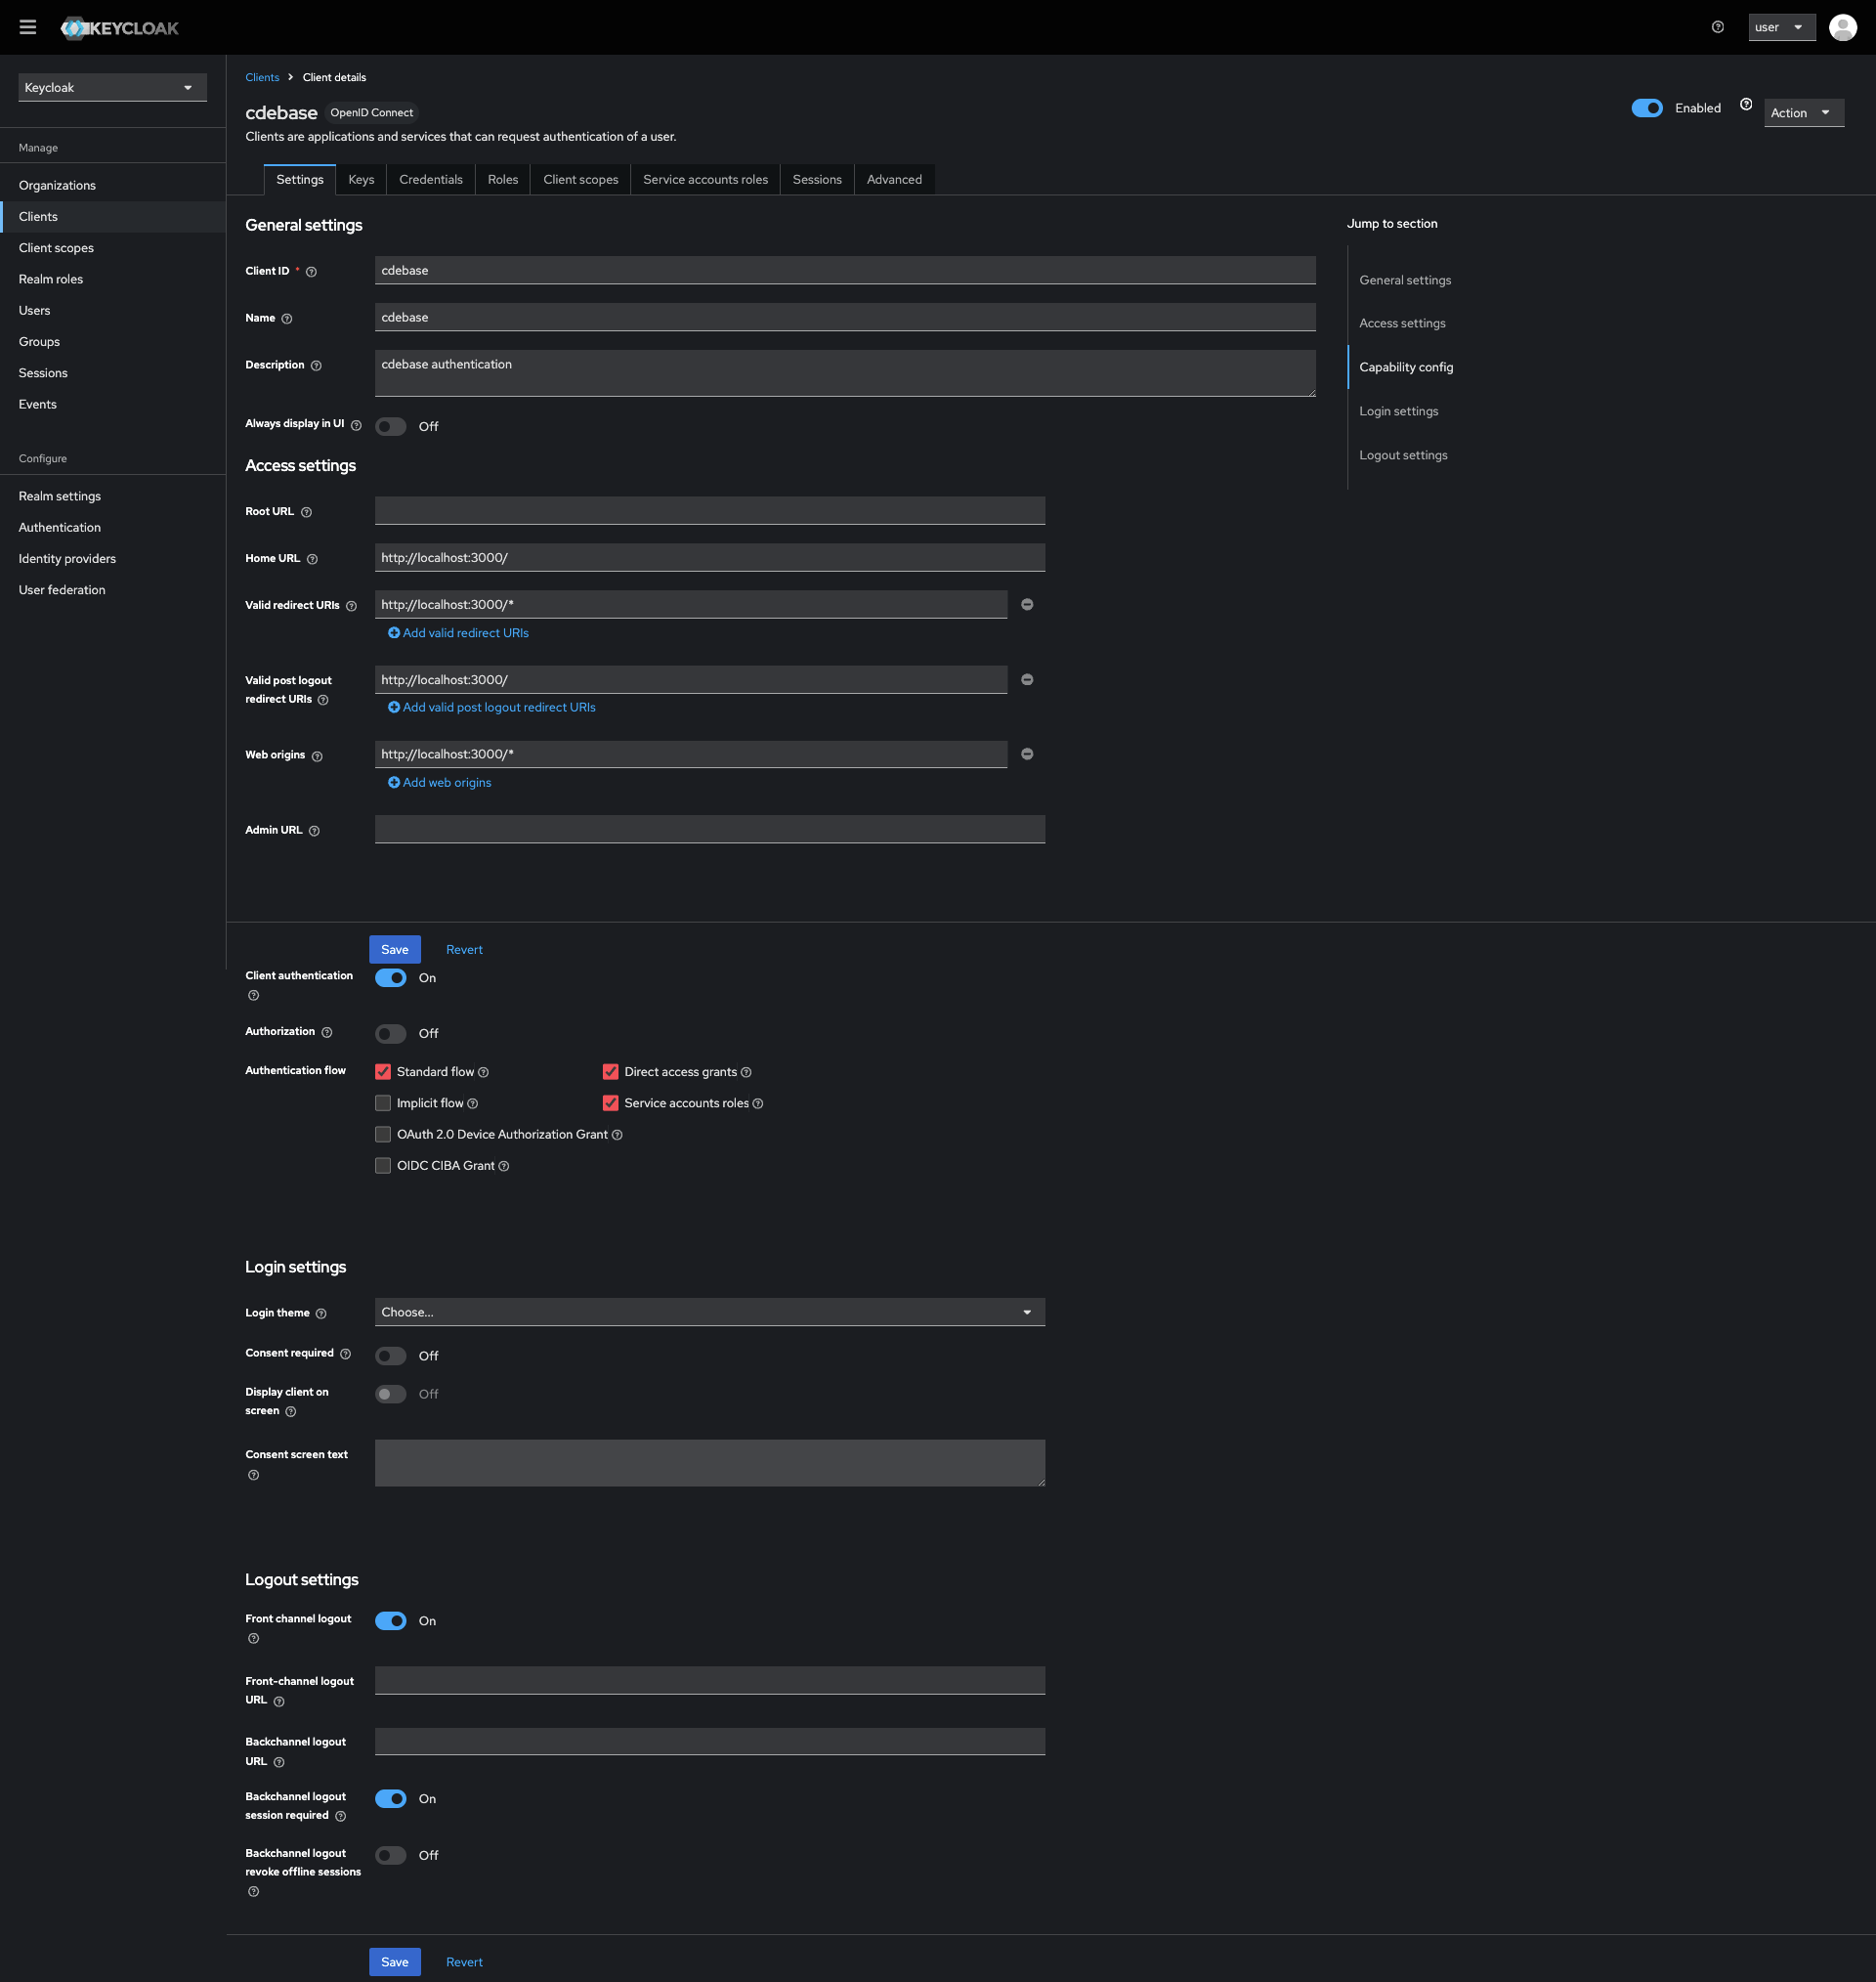
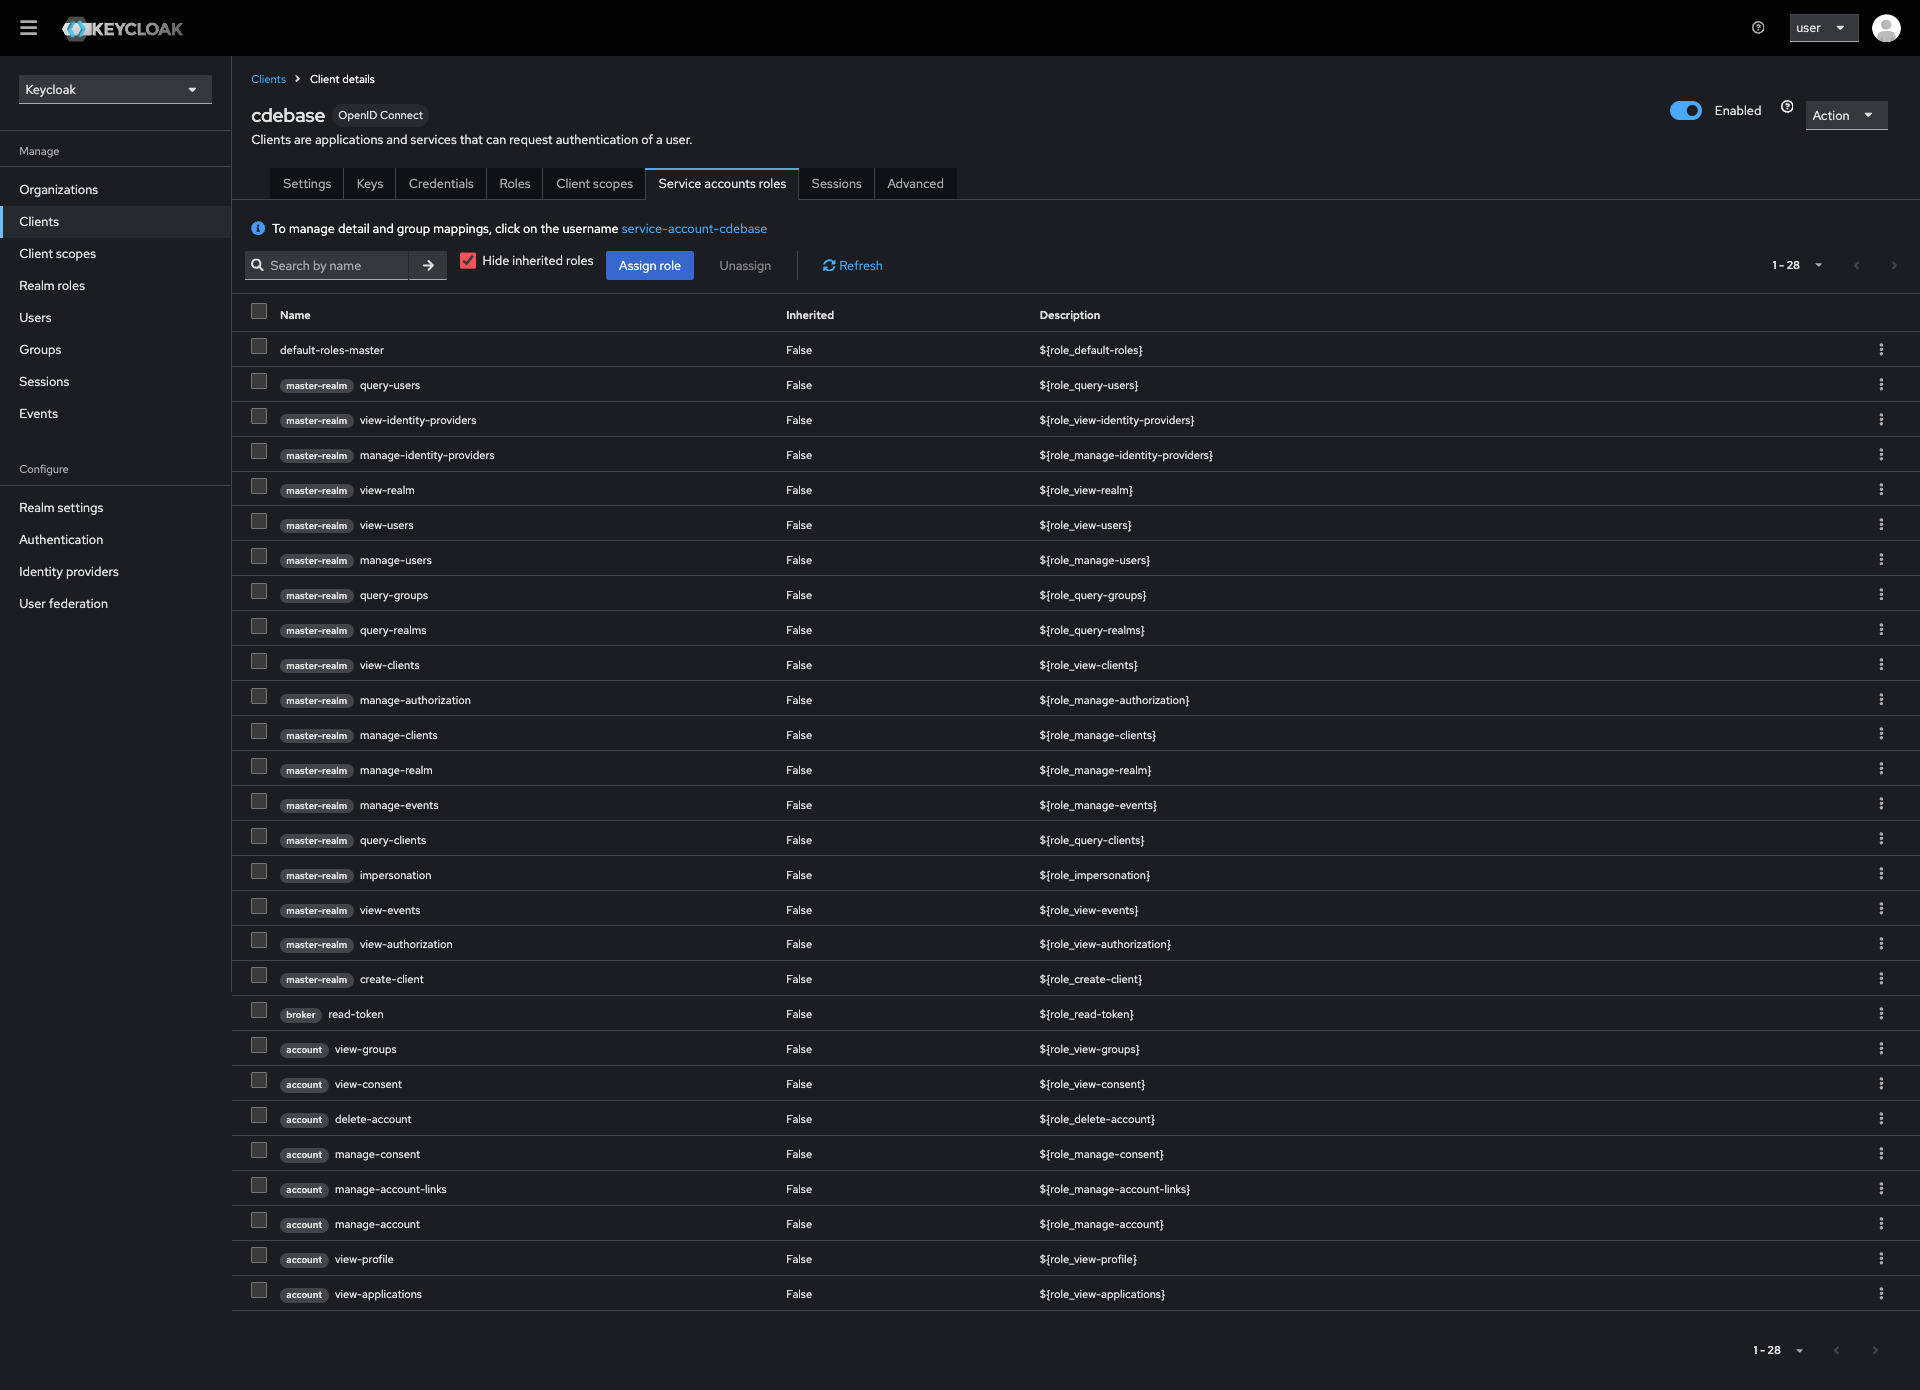
- Setup a new client: Import service account roles and client scopes.
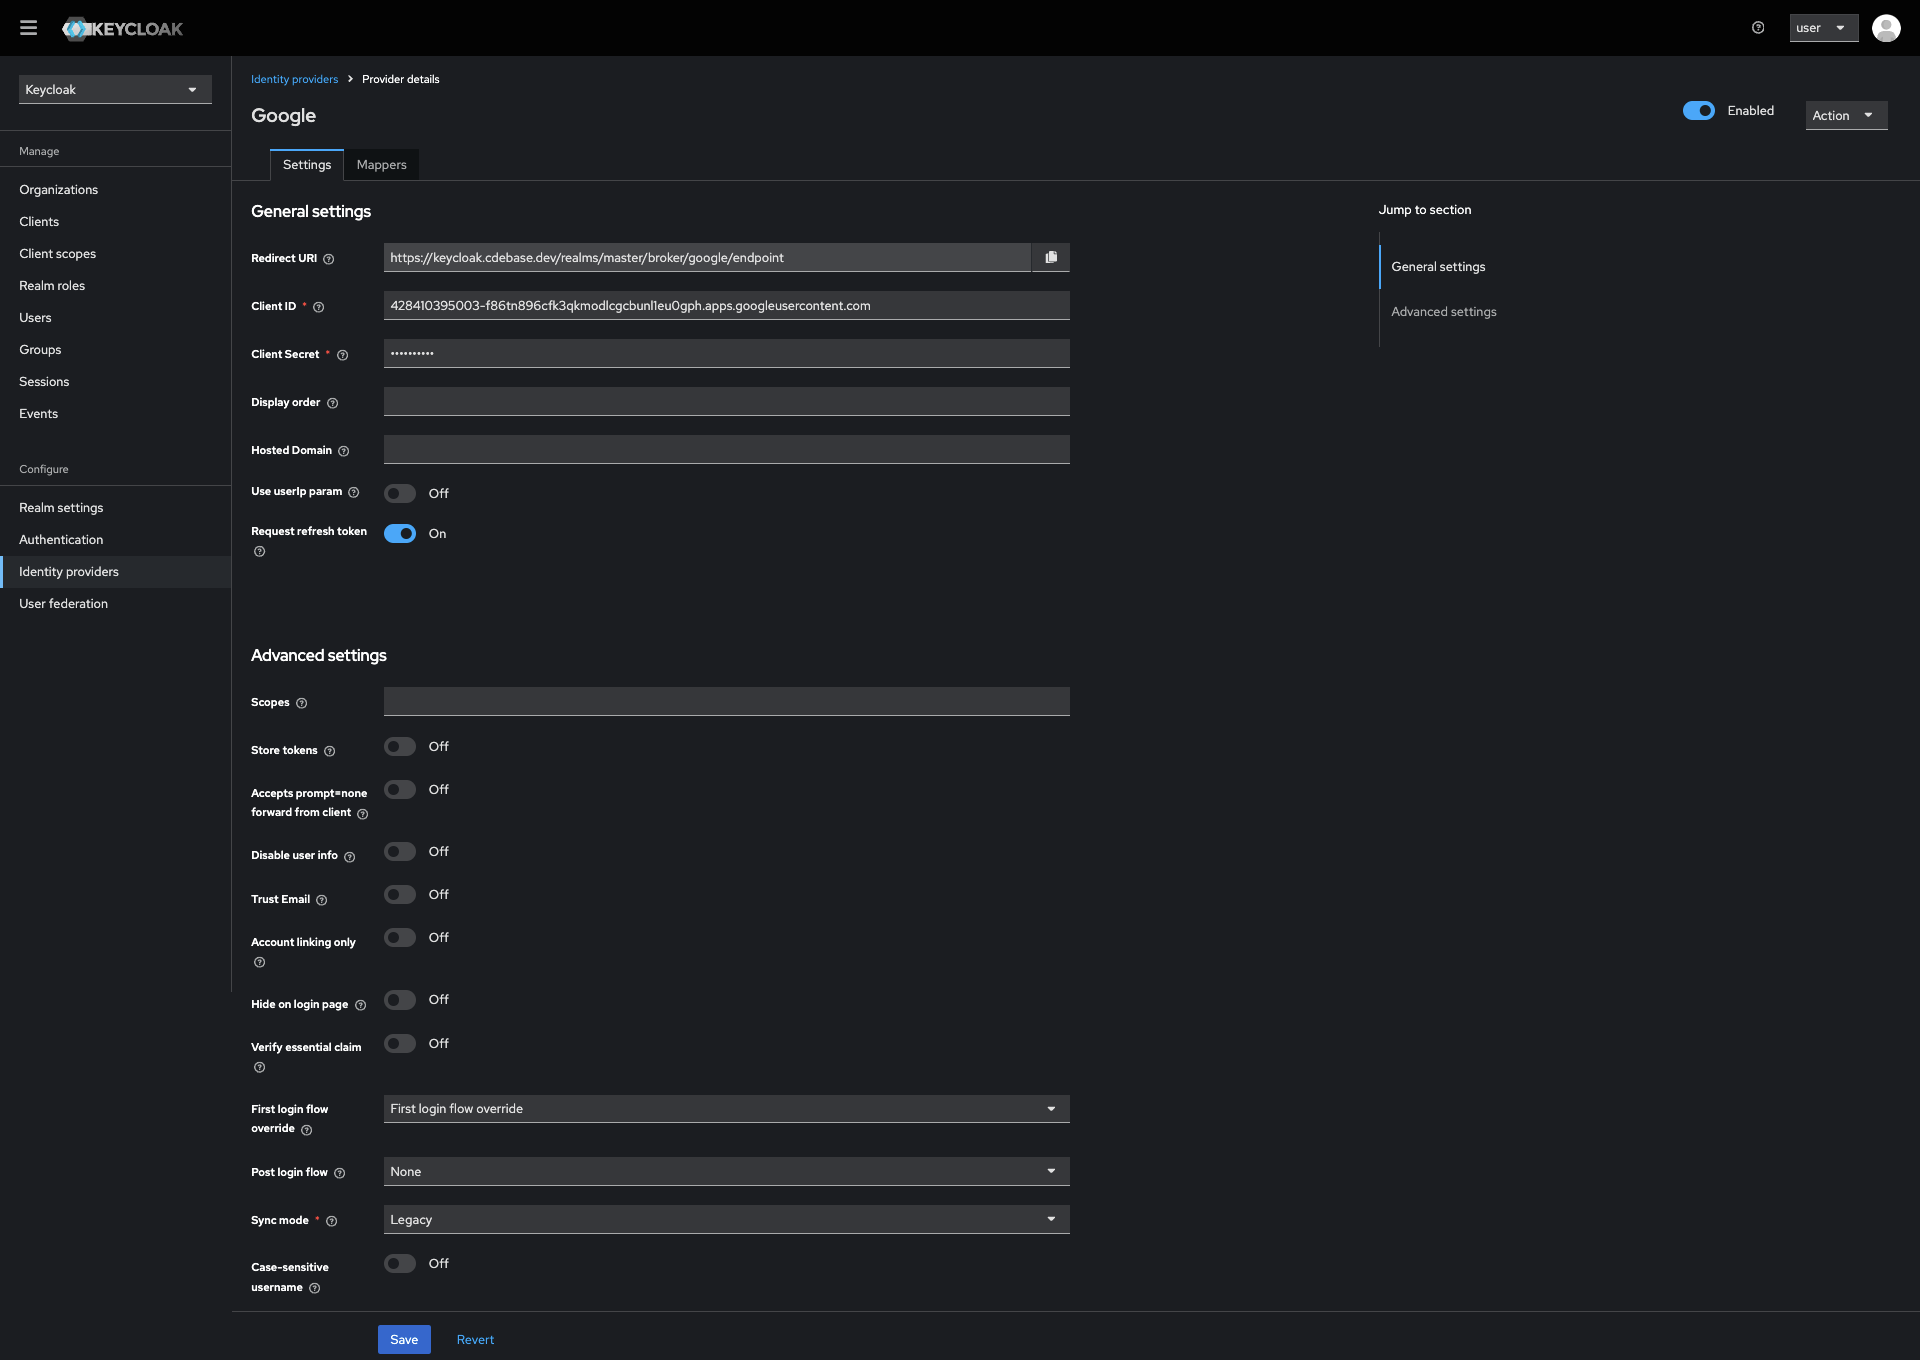
- SSO Configuration: Configure the identity provider and set up the client ID and secret obtained from the developer's account. Set the redirect URI in the developer account of the app you are setting up (e.g., Google SSO). The redirect URI would be like this:
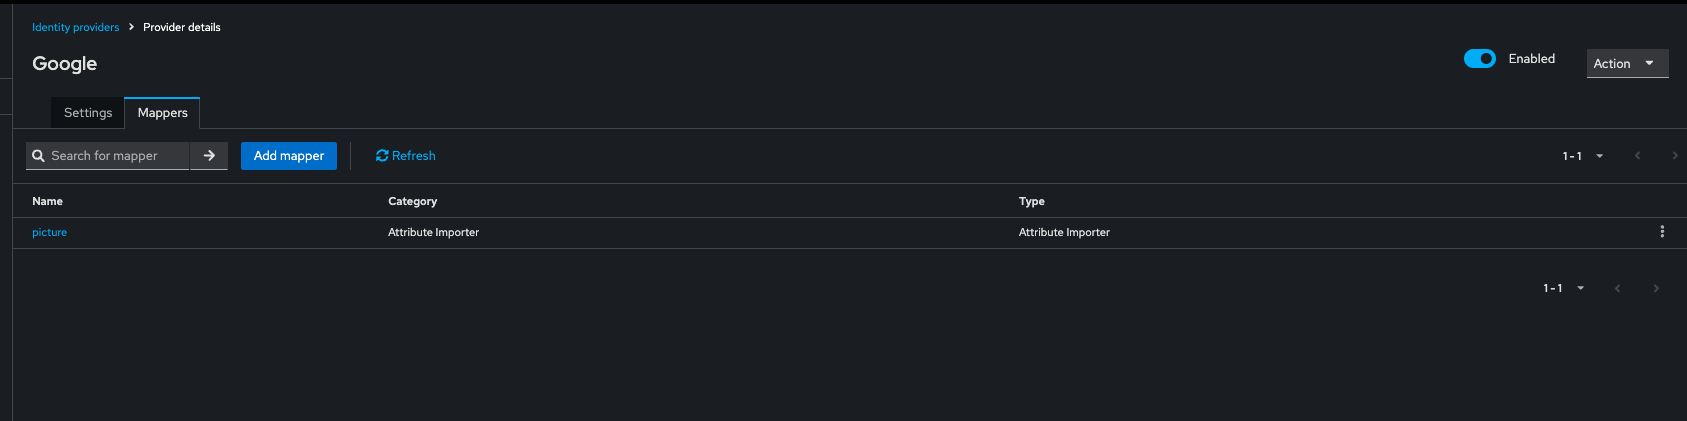
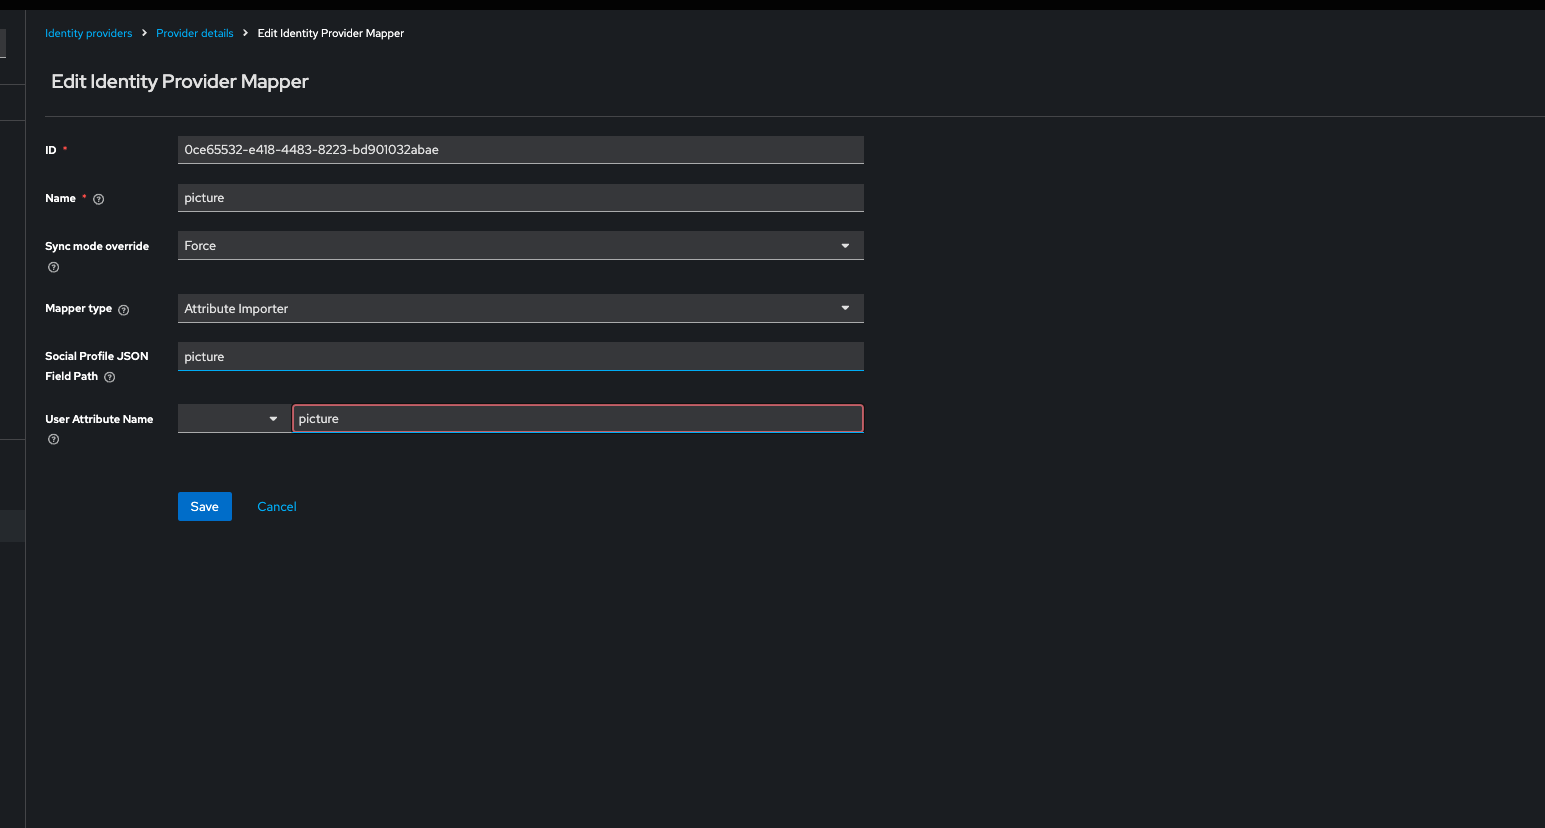
https://keycloak.cdebase.dev/realms/master/broker/google/endpoint. You can copy it after you save the identity configuration. - Profile Picture from SSO: To get the user's profile picture from SSO, you need to define a mapper. Check this Stack Overflow thread for proper configuration.
Cleint Settings
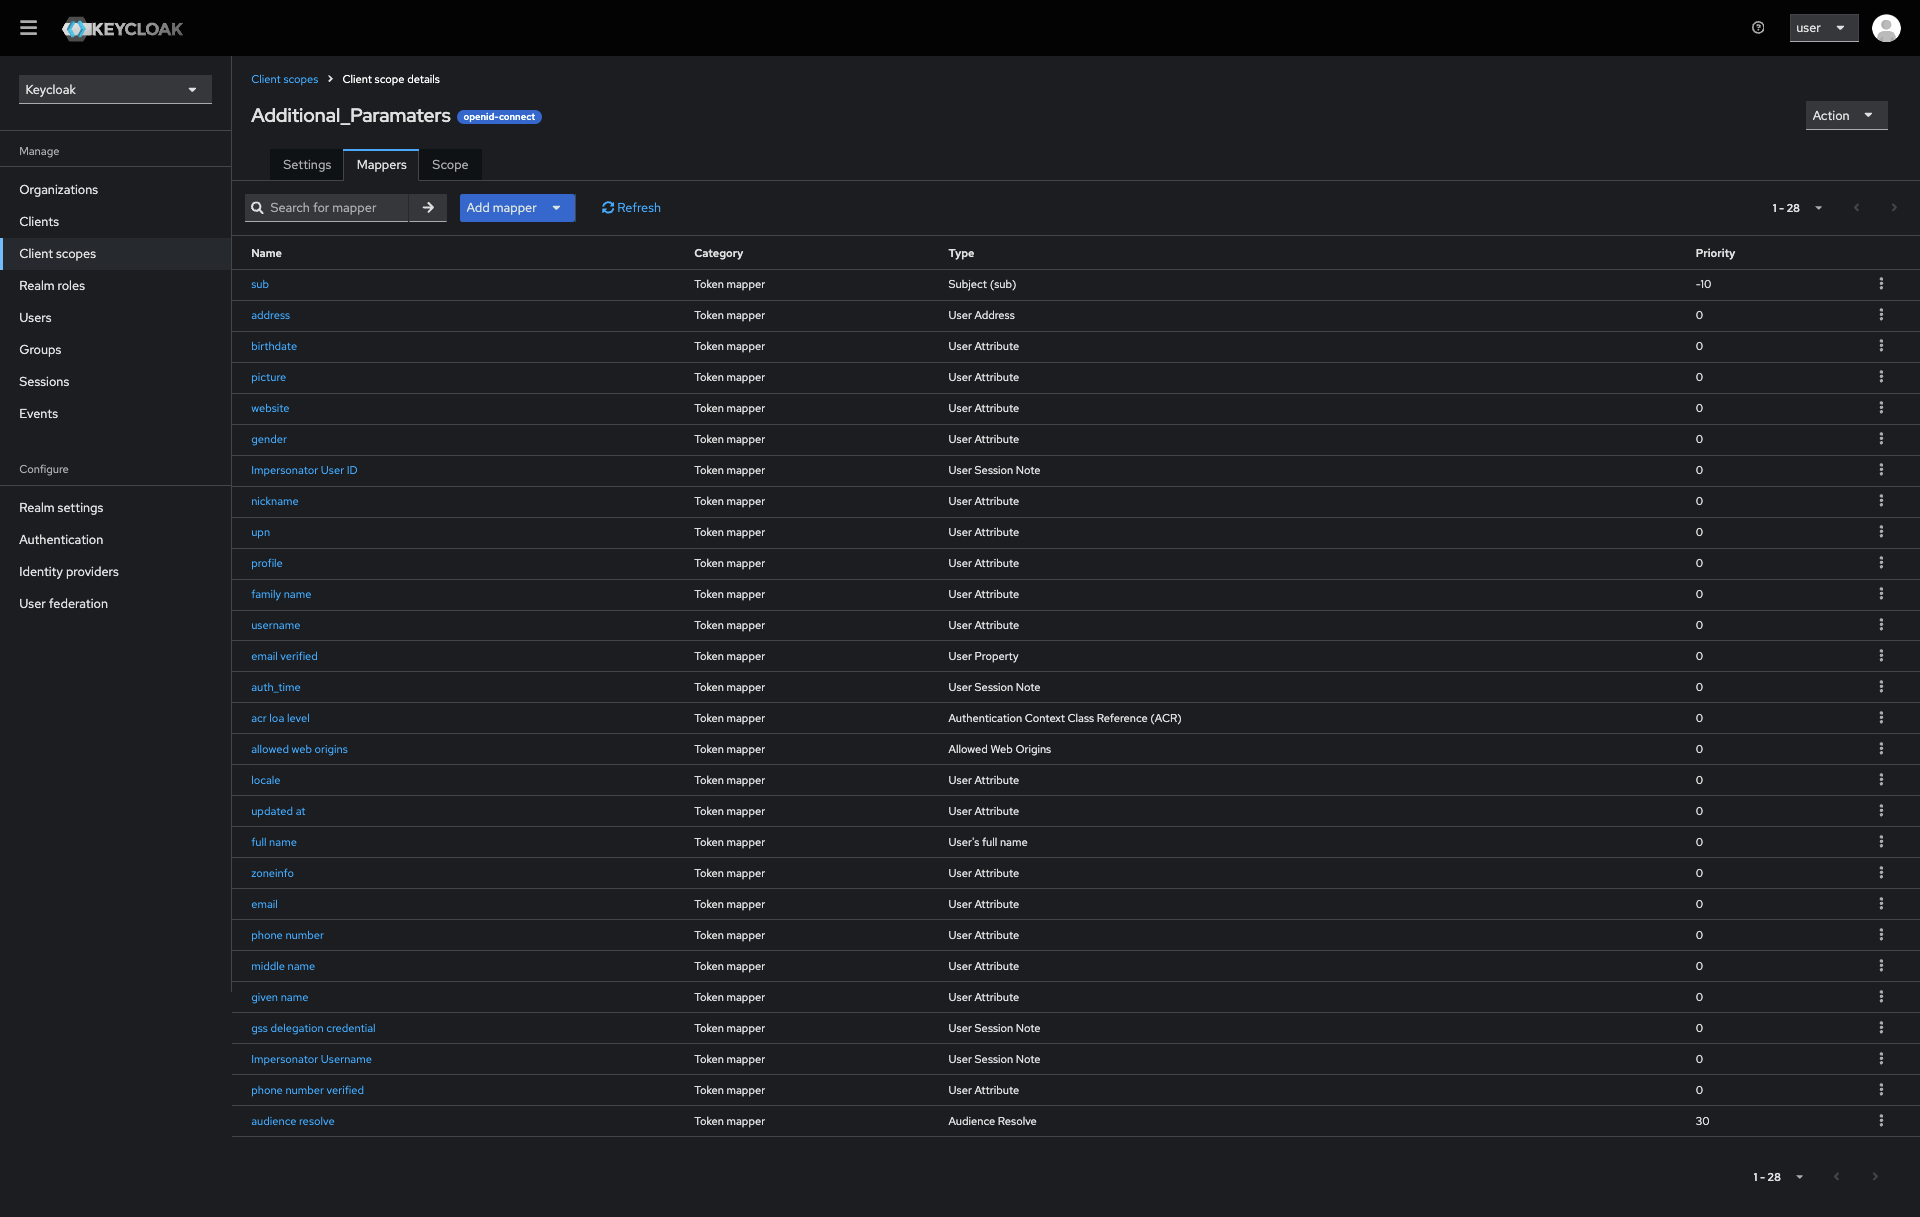
Client Scopes ( Custom Scope )
SSO Configuration